This is a re-post of a previous tutorial due to an older platform causing some incompatibility.

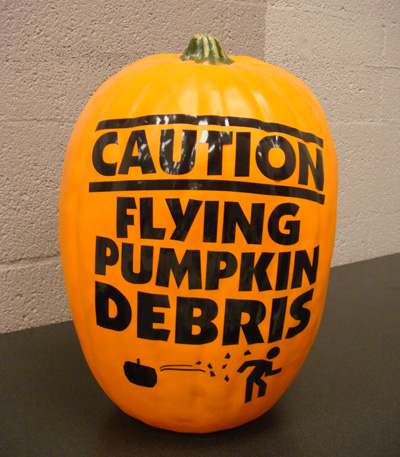
Pumpkin carving has been around for years. Seriously. Like….over 50 or something. Are you still cutting out two dimensional pumpkin designs? Do your carvings still have simple geometric shapes for features? Are you still under the impression that you’re doing this to frighten away evil spirits? If your answer is yes to any of these questions, ancient European civilization just called. They want their superstitions back….and they would like borrow a cup of mercury to make some cough medicine, too.
If you’re in the mood for something different this year, maybe you’d enjoy doing a little three dimensional pumpkin carving. But you may not be ready to dive in right way. There are a few things to consider first. Hopefully, this online tutorial will put you on the right path.

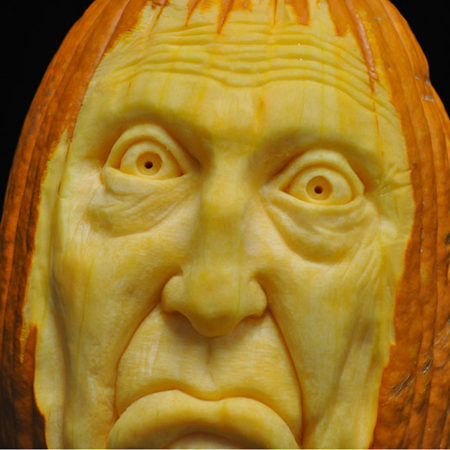
The type of pumpkin carving you see in my gallery is three dimensional sculpting of the pumpkin rind. Traditional jack o’lantern techniques are of little use here. Still, if you’ve done a few elaborate carvings in the two dimensional style, you’ve undoubtedly picked up some useful knowledge about this medium already. At the very least, you’ve acquired some valuable patience and planning methods that are helpful in executing a project like this…that, and you’re already used to the smell. I always found it interesting how a portion of the population have little tolerance for the smell of freshly cut pumpkin. Yet, it doesn’t bother other people at all.
First things first. Pumpkin sculpture demands some proper sculpting tools and I find that a bathroom plunger and an electric toothbrush are at the top of the list….not really. But you may be surprised. Your typical knives will come in handy. But you may have to actually put on pants and go do a little shopping for this one. I’ve used a lot of different things and experimenting is fun. Just the same, I’ll run down a few important things you’ll really want to have ready.
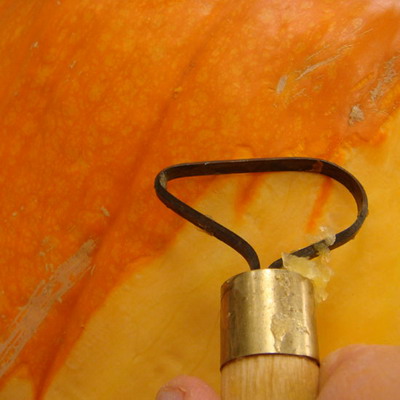
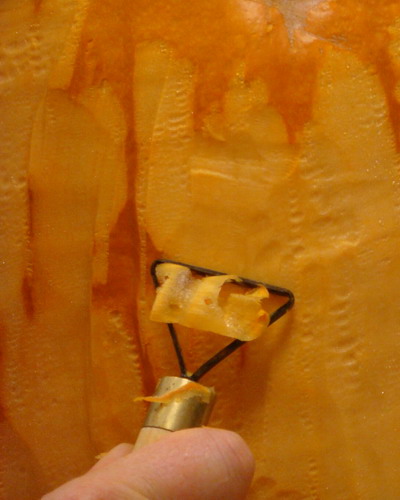
Ribbon tools are going to be your most valuable item. No, they are not for making ribbons. They are designed for use with clay. You can find them at a craft store that carries those type of supplies. There are dozens of types, shapes, and sizes. Avoid the “wire loop” variety and stick with the ribbon style. The flat blade is a must for slicing through pumpkin rind. Of course, pumpkin rind is much more resistant than clay so it’s not surprising to have tools wear out if you carve very much. I’ve repaired tools with heavy epoxy and even reinforced a few before they had a chance to loosen or break. You can see this in some of the photos. Take care of your tools by cleaning them and allowing them to dry properly. Some types are more prone to rust and may benefit from a light coat of oil before putting them away.
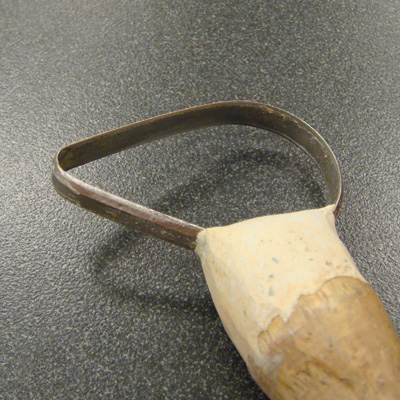
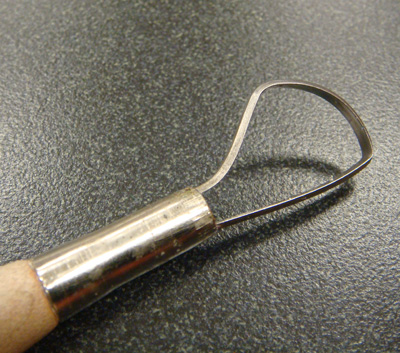
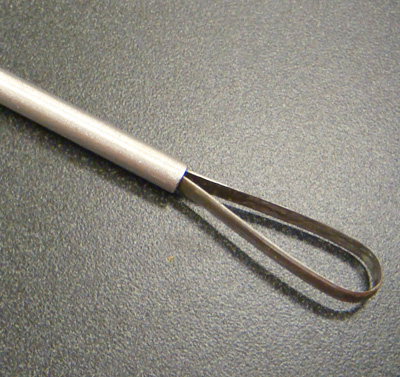
Ribbon tools often work fine right out of the package. If you’re industrious, you may decide to file a sharper edge. This demands small files and/or sharpening rods.
I’ve carved a lot of pumpkins and I have got quite a few different style ribbon tools I use, but a pretty basic set can allow you to do whatever you like. I’ve also bought a lot that I ended up not liking that much. I’d say just buy an assortment package and learn for yourself which are better for you. They are not too expensive…..unless….
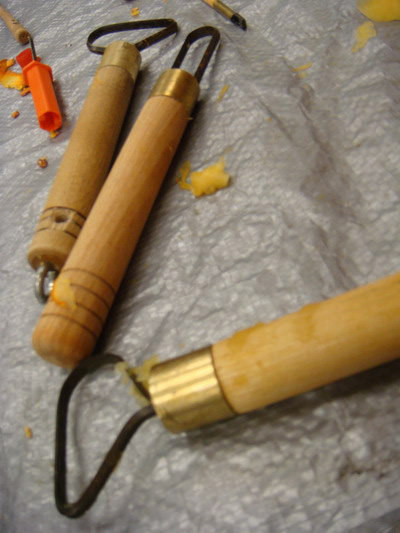
If you want the cadillac of all ribbon tools…and don’t mind shelling out a bit more for them, Dolan tools are superior in just about every way. They are hardened, knife quality steel and arrive with a razor sharp edge. Be careful not to slice an artistic groove in the side of your left hand. Kemper tools now have a Pro series which are very similar to the Dolan tools.
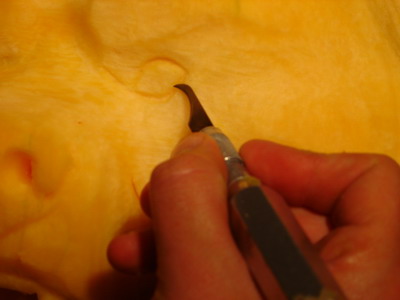
Certain craft knives now have router blades available. I’ve not used them myself, but you may decide that these work very well also. Lino-cut tools, another craft store item, are also available with a handle and several styles of interchangeable tips. I use these occasionally for textures.

For hollowing out a pumpkin, a typical long slim blade is still fine. I got mine in the fishing section at Wal-mart. You may find use for a scalpel type craft knife as well. The most useful knife for carving will have a curved blade with the edge on the concave side. Craft knifes have these blades but they are not as plentiful as straight blades. Still, a craft store that has wood carving tools would certainly have them. There is also a culinary knife called a bird’s beak peeler that is basically just a larger version of the same blade.

Oh enough of this…I’ll bring up other items as we go along. On to the good stuff…
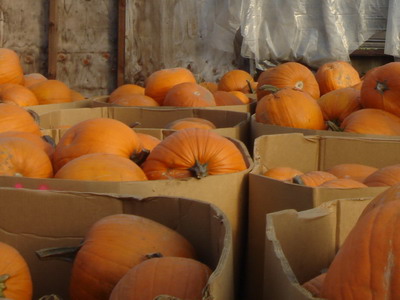
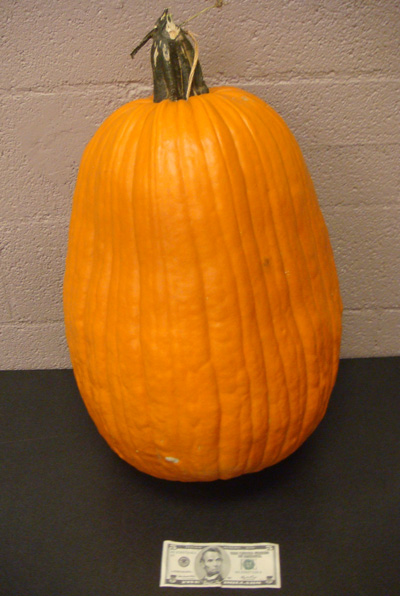
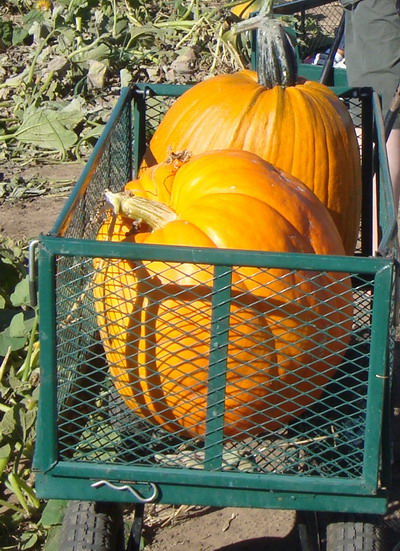
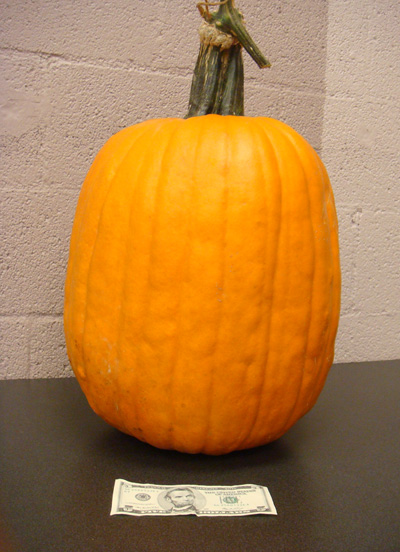
Now lets pick out a pumpkin! You can carve any pumpkin you like but I have found that certain varieties do a little better than others for me. Unfortunately, I can’t really identify them by name so I’ll just include a lot of pictures. I’ve found great ones at the supermarket, roadside stands, pumpkin patches, anywhere and everywhere. If you’re just getting started, you may want to go by price. Steal some from the patch down the street and Go legally purchase some cheap ones to play around with. I recommend the biggest available for the price. When you are carving the pumpkin rind, you’d like the rind to be thick. Choose the heaviest one for the size you’re getting. The extra weight is usually in the rind. If not, the pumpkin may contain illegal immigrants. Contact the local authorities and Aquaman immediately.

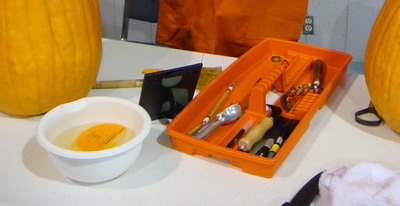
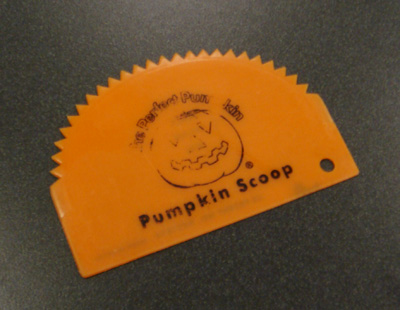
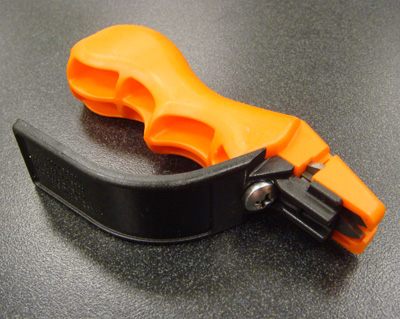
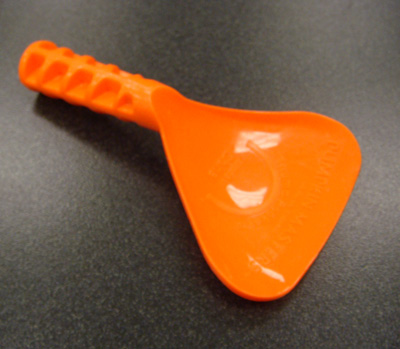
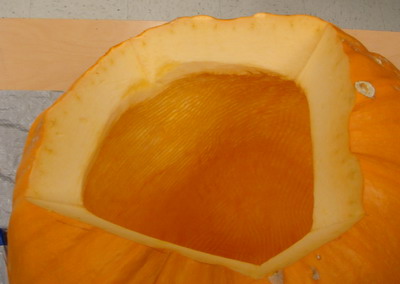
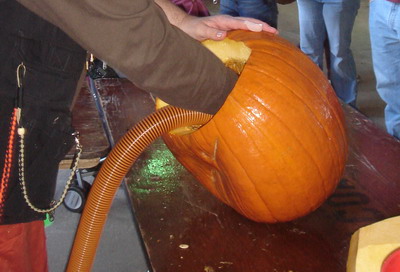
You don’t have to gut your pumpkin. I don’t hollow all mine out. It’s an extra step that is easily the messiest part of the process. But if you think you’d like to light it, it’s much better to gut it beforehand. You can also have a strong light inside while carving to help give you an impression where the thin parts of the rind are. I haven’t tried this myself, but it makes sense, eh? DO NOT use a gutted pumpkin for a hampster habitat as a hamster will eat his way out! Use whatever gutting tool you like. But keep in mind, you need the rind to remain thick. You can’t afford to thin it down. Some gutting tools are designed specifically to thin the wall since that is beneficial for the 2-dimensional style of carving. I use an gutting tool that is essentially a piece of flat orange plastic with teeth to one side. I haven’t seen them for sale in years but it was made for pumpkin scraping. I’d say any pumpkin scraping tool will work. Just don’t scrape too much! Here’s a tip…Pumpkin juice is acidic and carving is vigorous. If you don’t wear rubber gloves for gutting or wash your hands periodically, you’ll likely have sensitive cuticles later. This is particularly true if you’re going to carve several pumpkins. Keep a dish or pail of water to rinse your tools and hands in. It’s also a good idea to carve with clean hands for the sake of not introducing bacteria into the carved surface and promoting faster decay.
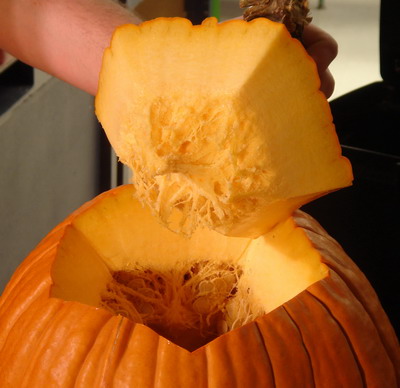
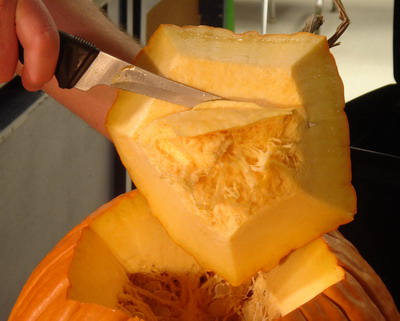
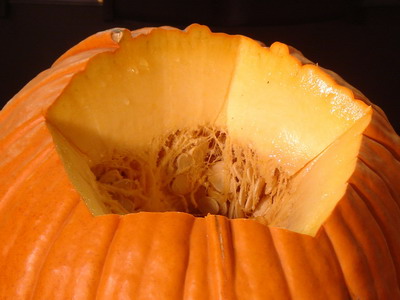
I like to use the polygon shaped lid. It’s easy to control the knife and the lid stays put better. Don’t forget to angle the blade in. Always point the blade toward the center of the pumpkin when lid cutting. If you have a pumpkin that won’t stand up, cutting the opening on the bottom can allow you to help the pumpkin stand upright better.

What, in the name of all that is round and orange, are you going to carve? Here’s a question for you. Are you a sculptor or do you have any experience with this type of art? If not, pumpkin rind is not the most forgiving medium to start with. Don’t panic, you don’t have to enroll in a class or anything. But can I make a suggestion? Don’t bite off more than you can chew.…and I’m not talking about eating pumpkin although a small portion of raw pumpkin rind can be very filling. I’ve been an art teacher for a number of years now and I’ve learned that success encourages learning and progress. Give yourself a chance for success by avoiding too big a challenge your first time out. Even if you have sculpted other mediums, pumpkin is…well…different. Its firm but fragile. It varies from pumpkin to pumpkin. The texture will try to work against you. It’s wet at first and begins changing as soon as you start carving. If you spend too long on a pumpkin, you’ll notice the consistency you were becoming accustomed to begins to deteriorate.
Pumpkin carving is a subtractive technique. That means you take away from the original form to make your art. The most common comparison would be stone or wood carving. Once you remove the rind, there’s no putting it back. You are also limited by the thickness of the rind. You may go too deep and then what?
Traditional carving can make use of patterns, stencils and drawing directly on the orange skin. This won’t help you when your removing the skin entirely. You can draw a sketch or have an idea in mind before you start…But be flexible. Allow your first carvings to go their own way a bit. You’ll be gaining experience and skills as you proceed.
I’ve carved hundreds of pumpkins and, truly, I have never ruined one. From the beginning of a carving, I’m allowing for adjustments as I discover the characteristics of each pumpkin. This frame of mind will increase your chances for success.
So. What to carve? Something hyper-realistic or simple? Be honest with yourself and choose. Not sure you’re ready for a portrait of John Wayne? Maybe a tiki face? They are of endless variety, simple in design (they’re primitive carvings after all), recognizable without needing to be a likeness….They are also pretty fun to do. Google tiki and totem images. Not interested? Any type of stylized face will do. By this, I mean a face that is cartoony or abstract rather than realistic. If you’re ready, realistic is always impressive. A bigger challenge may be to do a likeness…carving a specific person’s face. Keep in mind that even an accurate depiction could fall short of your expectations when rendered in translucent pumpkin rind. You will find yourself adapting your subject into a form of relief carving. A relief carving is a sculpture that is much shallower than life but can be realistic. A common example is the portrait of Washington on a quarter.
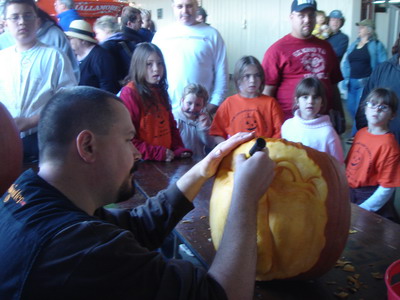
For this tutorial, I’ll include examples of several types of subject matter but will be approached with the assumption that we are carving a face. One can’t say too much about the benefit of reference material. Tacking up a picture to look at will help at much as anything I can tell you. One of my favorite things to do is to set up a mirror in front of me while I carve. One can make infinite interesting faces in their reflection to use as source material. It’s not that you’re doing a self portrait…You’re studying the way the face moves in expressive ways. For this approach, I recommend carving with the door locked.

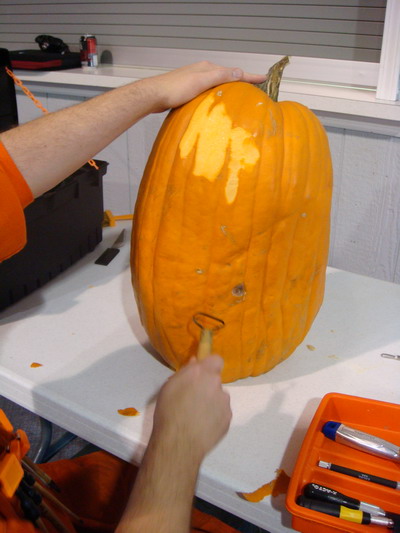
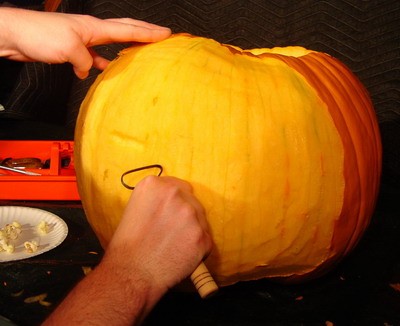
Take the skin off first using a large ribbon tool. One with a flat edge on top will work best. It may take a few tries to get the right angle and the right force and speed down, but this is generally a fast and easy step. Have a bucket or trashcan ready to catch all the shredded pumpkin. I like to cover the table surface with tarp or plastic so clean up is easier. You can also expect a lap full of wet shreds. Do you have an apron you could put on? If not, lay a towel across your lap.

Now that the pesky skin is out of the way, you’re ready to begin sculpting into the flesh of the rind. A good place to start is in the center of the face…The eyes. They don’t have to be in the middle of the pumpkin. They don’t even have to be symmetrical. Visualize on the blank canvas of peeled pumpkin front of you and determine approximately where you’d like the eyes to be. The eyes will be set deep into the face. Begin using your large or medium sized ribbon tools to lift out cavities of rind where you’d like the eyes to be. Eventually, these will be some of the deepest parts of your carving. You don’t have to go all the way down right away. It takes carving a few pumpkins to get a feel for just how much your have to work with.
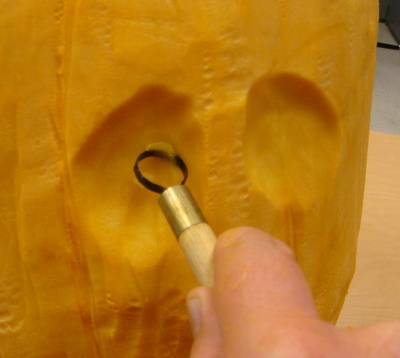
During this and the next few steps, one should keep in mind that details will come later. All we are trying to do now is block in a very general shape. Next you will think about the shape and length of the nose. Begin carving in the recess under the tip of the nose. Go as deep as you did for the eyes. Timid about going deep? Good! Remember what I said about this being a subtractive technique? You can always take more away later. What you can’t do is put back anything you remove. It’s perfectly logical and a good strategy to remove the rind gradually. The only problem you will notice is that if you take too long on a carving the texture of the rind begins to change after a few hours. I couldn’t say exactly what is happening. Maybe the rind begins drying out some. If your working slowly, spritzing the exposed rind with water every so often could help. I have not tried this personally.
Since carving off too much is what you want to avoid, you’ll need to determine what parts of the face will protrude the most. The nose, no doubt…Also the chin…Hairline? Horns? Beard? These are areas you want to plan out and leave more rind there to work with.
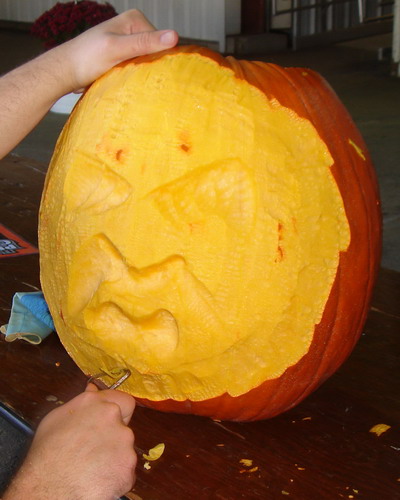
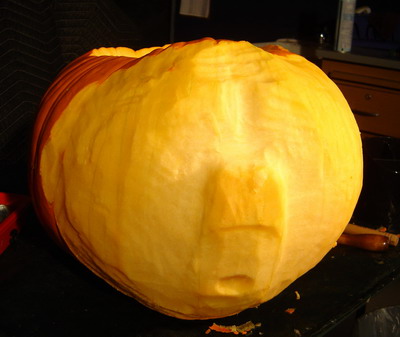
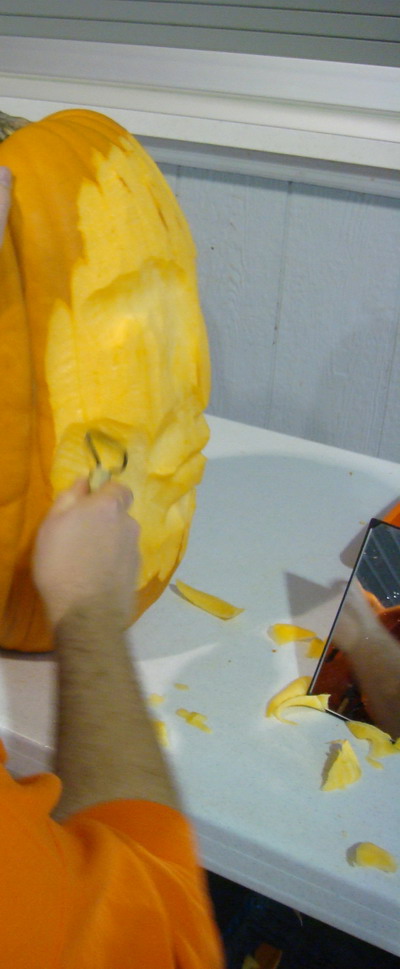
Keep gradually forming the basic shapes of the face. Your goal should be to see the location of all the features without seeing any detail in them. You don’t have to frame the outline of the face, but if you want to, you could begin doing this now. Basically, start carving away the rind from the area outside where the face will be.
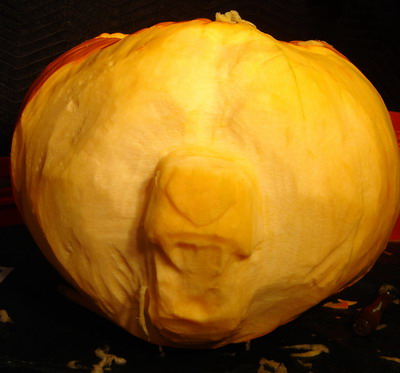
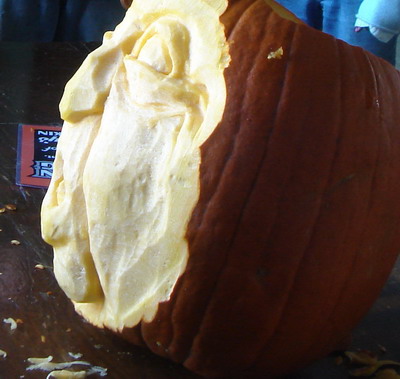
Preliminary Details
The next step after basic features would be to go into each of those features, one by one, and begin forming the basic parts of each feature. Inside the eye cavities, begin forming the convex shape of the eye and eyelids. Reference material is very helpful now, as always. You may be using smaller ribbon tools now. Outline the nose and begin forming the general slopes and nostrils. When you go into the mouth area, decide if you will have teeth or other details showing. If you have eyebrows on your pumpkin, leave them protruding and carve away the surrounding areas. Hair and other textures can come later.
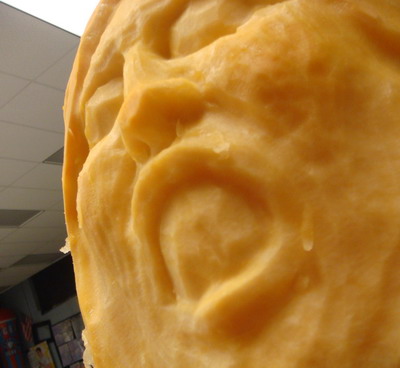
You’ve noticed that your pumpkin very likely has a lot of rough edges that are getting in the way of your fine detail work. If only there were a way to smooth those rough edges away. Well, hold on to your lids, folks, it’s one of the easiest techniques your going to master. All is takes is a little elbow grease…and a scouring pad.
Fibrous cleaning pads like the ones show above are better than nothing. But if you really want to shed those unwanted rough spots fast…a stainless steel scouring pad works like magic. There are a lot of varieties of these but the best I have found are the ones sold by Fuller brush. The ones you pick up at the grocery store will do…they just may not last for very many carvings.
A word of warning. I have been an art teacher for a long time and one thing I have learned is, when you introduce someone to a fun, easy technique…and this is definitely one of those times…novices tend to go overboard and overuse it. With your scrubbing pad, you can quickly remove all the character from your carving and this is something you don’t want to do. Basically, try not to overdo it on the polishing.
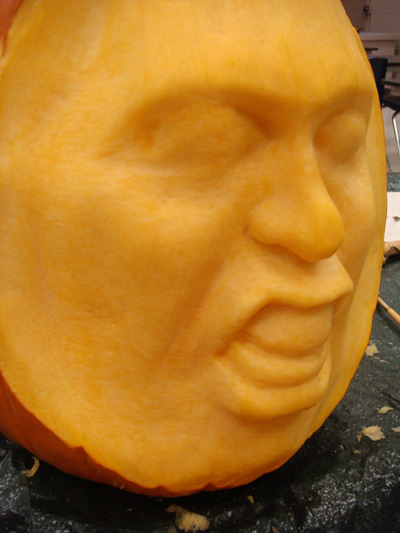
After smoothing out those lines and wrinkles, its time to start adding lines and wrinkles! You’ll be using your carving knives and the smaller ribbon tools now. This is where you will add in the fine details that will make your pumpkin creation much more impressive. Again, reference photos will really help out with this.
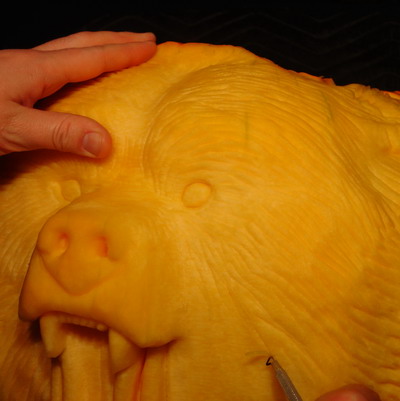
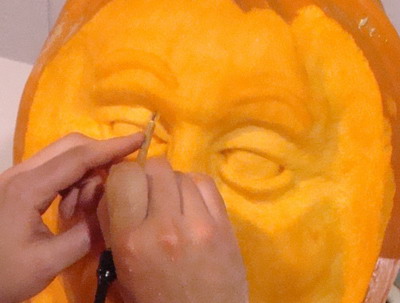
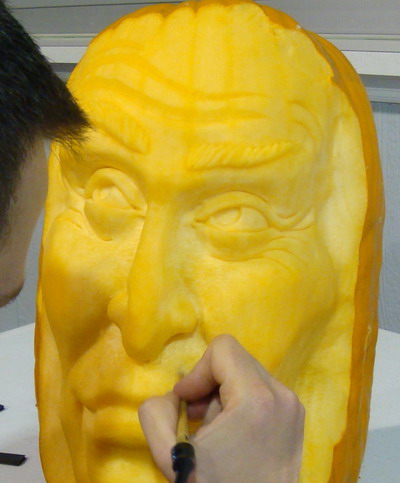
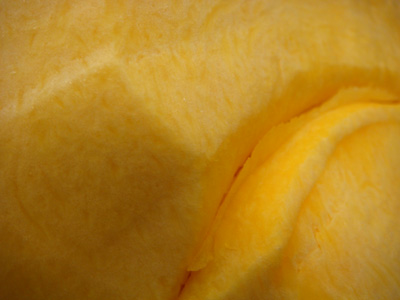
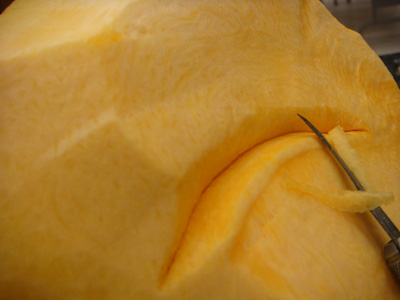
The small ribbon tools can really get in there and add fine, sharp details. However, pumpkin rind has a tendency to conceal your details. Part of the reason for this is the translucent nature of the rind allows light to pass through and subdue the natural shadows. This robs your carving of precious contrast. To remedy this, learn the fine art of the v-cut and use it to emphasize subtle details and make them more pronounced. This is invaluable for creases and wrinkles and any details of the face. The following images describe the process.
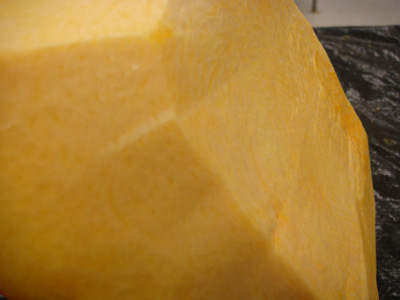
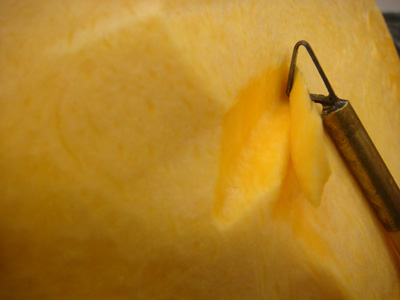
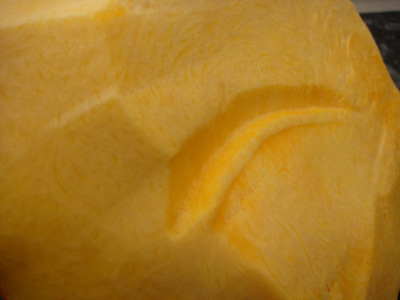
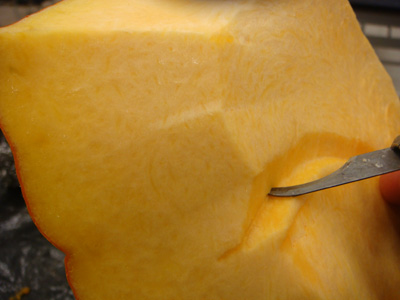
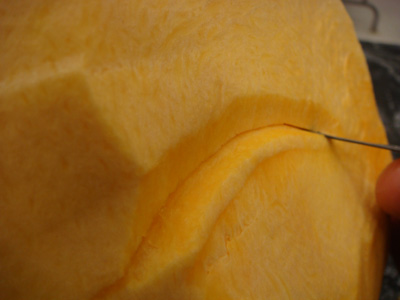
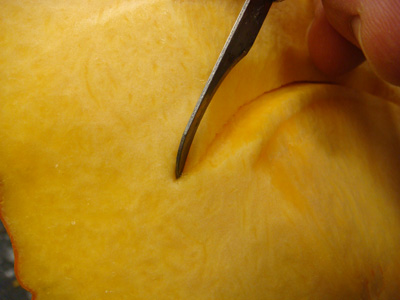
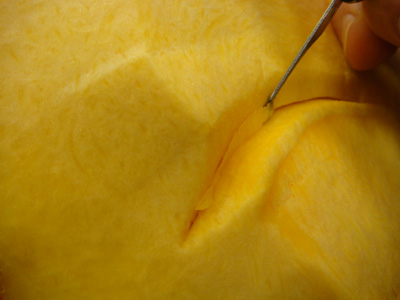
Okay. You’re all done with your carving. Now how can you make it last? Bad news. You can’t. In fact, it’s already begun to deteriorate. One might make the assumption, “Hey, maybe my carving will start to shrivel and add even more character to the face…like those shriveled apple faces and stuff like that.” Nope. I’m afraid not. The drying process that has started in your carving will cause the details of the face to simply shrink away. It’s pretty safe to say that right now your pumpkin looks the best it will ever look. You will certainly notice a difference in 24 hours. However, if you’re not ready to display it yet, there are ways you can attempt to prolong the current appearance of your pumpkin. In addition to the following, avoid handling the carved surface of the pumpkin with your bare hands as much as possible.
Technique Numer One – TAKE A PHOTO
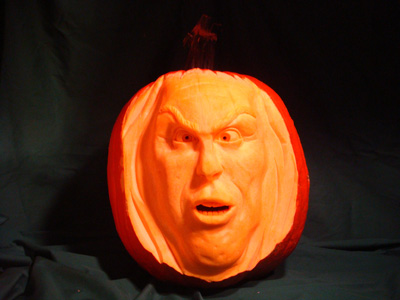
By far the best and most essential way to preserve your creation. Take some good photos. Notice I didn’t say “poor photos”. It wouldn’t be a bad idea to acquaint yourself with some amateur photography techniques and get the best photo you can. Here are some tips to get you started:
- Avoid using a direct flash. The bright light will wash out all your contrast. A flash that can be directed to bounce of a wall or ceiling is better.
- When photographing outside, choose to do so in the early morning or later evening. The softer light makes for a better photo.
- Use a tripod and maybe even the timer function.
- Photograph your pumpkin with different lighting arrangements to find the best one.
- Selectively directing a lamp or two may be better than regular room lighting.
- If you light the inside of your pumpkin, use a low watt lamp bulb rather than a candle or nightlight.
Technique Number Two – REFRIGERATE YOUR PUMPKIN
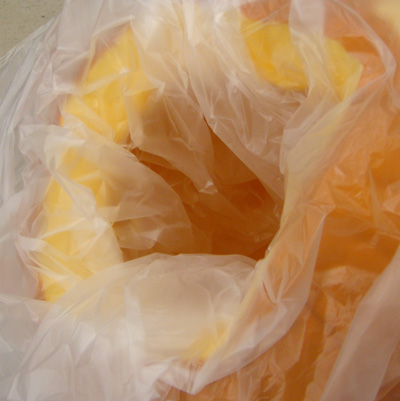
Usually, a person does not have extra room in the ‘frig for a pumpkin. But, if you want to preserve your actual carving, this is the best way. Slip a garbage bag around your pumpkin and tie it off. Be careful not to allow something to press against your carving in the refrigerator and leave an unsightly bruise. To prevent drying, soak a towel in clean water and drape over the carved portion. Take it out and display it, but always place it back in the refrigerator. DO NOT FREEZE YOUR PUMPKIN!
Technique Number Three – STAY COOL
No room in the ‘frig? Keep it cool some other way. You should still keep it in a bag to prevent drying. Maybe the climate is cool enough where you live that you could simply bag it and place it outside. Don’t let it freeze though. If it’s not cool enough outside, ice it down in a large tub….or line the inside with a garbage bag (if you hollowed it out) and fill the bag with ice.
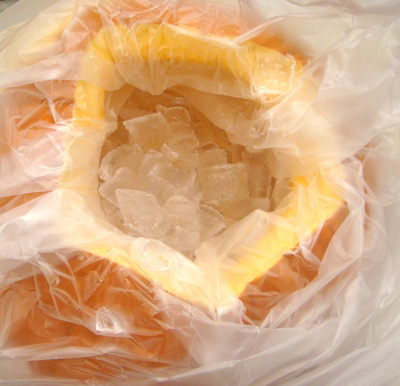
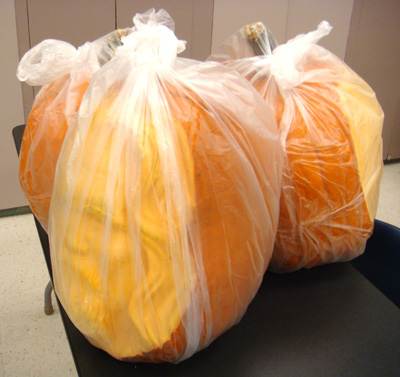
Those are pretty much the only techniques I would recommend. I would hesitate to apply anything to the carved surface other than clean water as it will possibly alter the look of the surface in a negative way. There are plenty of other preserving suggestions on the web. Just remember that most you will find are generally suggested for the 2-dimensional cutout jack-o-lanterns and may not be ideal for this type.
After your pumpkin has been displayed for a few hours and you notice some drying, you can temporarily revive it by completely submerging it in chilled water for a couple of hours. I put a tiny bit of bleach in the water, mainly to make sure its not contaminated.
Well, that’s about it. I will continue to update this tutorial to answer particular questions people have or as I remember things I have missed.


